Sunday, February 26, 2012

Custom Cooler Radio Construction - Part 2

Part 2 - Templates and Planning

  1. I found it very helpful to use foam board as my template material
  2. Next position where each component will fit
  3. As you can see the divider goes higher than the instrument panel to keep the cold air on the beverage side


Challenge: Fitting everything in half of the cooler.

Friday, February 24, 2012

Custom Cooler Radio Construction - Part 1

Part 1 - Cutting The Speaker Holes
  1. Create a stencil for tracing the inner diameter of the speakers 
  2. Position stencil high enough on the cooler to minimize chance of water exposure
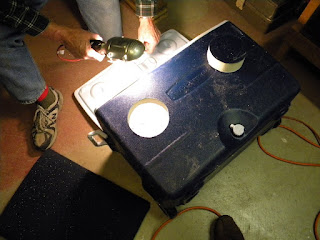
  3. I first attempted to use an exact o knife to cut through the hard plastic body, but when that proved to be in efficient we moved to a different approach. We (my dad and I) drilled a single hole all the way through the cooler body and then began cutting with a jig saw which worked very well. The jig also worked very well in later stages where we used it to cut the cutting board divider and top plate.


http://mycustomcoolerradio.blogspot.com/

Thursday, February 23, 2012

Construction has begun!

A little behind schedule because of my basement remodel. This wife wants me working on that as first priority. ;) 
 

Cooler before Pics.
Front


Back

Challenge to think about for this post: "Rounded Corners"

Not so much on the front side placement of the speaker, but on the back side of the cooler, there is a fairly prominent rounded corner. Since the speaker surface is intended to sit flush against another surface, I was concerned with a gap that may be created. More on that later...

http://mycustomcoolerradio.blogspot.com