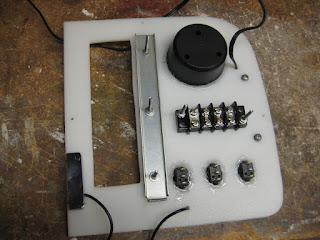
- Draw out where each component will go including screws
- Measure and cut out holes for
- Handle
- Cup Charger/Meter
- Stereo Head Unit
- Switches
- Lights
- Screws
- The long metal beam is being used to give the top panel addition support from the weight of the components
- The handle is nice for when i need to get access to the internal components, aka battery
This blog was created to share my experiences, photos, tips, and products for building a custom cooler radio. I have found many videos and a few blogs on the matter, but not to the detail I would have liked. This is my mission. Enjoy!
Tuesday, March 6, 2012
Custom Cooler Radio Construction - Part 5
Part 5 - Instrument Panel
Labels:
construction
Subscribe to:
Post Comments (Atom)


No comments:
Post a Comment